


6 Steps in a Typical Biopanning Process: An Expert Guide to Antibody Discovery
- 2026-05-24
- 152
The discovery of therapeutic antibodies and high-affinity binders relies heavily on in vitro selection techniques that can screen massive molecular libraries with precision. Among these methodologies, phage display technology stands as a foundational pillar in modern biotechnology, allowing researchers to isolate target-specific ligands from billions of candidates. To harness the full potential of these libraries, researchers must execute a series of iterative selection cycles known as biopanning. A deep understanding of each phase within a typical biopanning process is essential for streamlining discovery timelines, maximizing binding affinity, and successfully developing downstream clinical therapeutics.
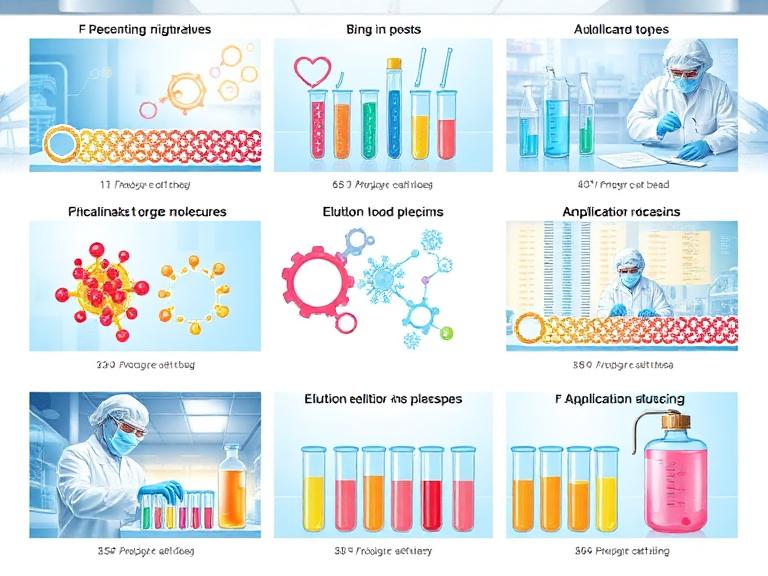
At KMD Bioscience Co., Ltd., established in 2022, we are committed to serving as a leading global provider of therapeutic antibody discovery and related Contract Research Organization (CRO) support services. As a certified high-tech enterprise recognized as a National Patent Pilot Unit and holding ISO9001:2015 Quality Management System certification for our laboratories, we provide premium screening platforms to scientists and research institutions worldwide. From our experience, many early-stage discovery programs fail to reach project benchmarks because they overlook the biochemistry of library depletion or default to unoptimized elution methods that damage high-affinity clones. This guide delivers a technical breakdown of the 6 key steps in a typical biopanning process, outlining the molecular interactions, quality controls, and validation methods required to isolate elite candidates.
Table of Contents
2. Molecular Dynamics: The Thermodynamics of Library Selection
4. Downstream Optimization: Humanization, Expression, and Validation
1. Technical Overview: Sizing the Biopanning Workflow
Before launching an in vitro selection campaign or screening complex synthetic matrices, discovery teams must master the sequence of operations. The summary table below outlines how individual phases coordinate within a typical biopanning process in 2026.
| Biopanning Execution Phase | Core Molecular Objective | Critical Reagents & Buffers | Key Quality Control Metric |
|---|---|---|---|
| Step 1: Target Immobilization | Anchor target antigen to solid support | Carbonate buffer, ELISA plates, magnetic beads | Uniform surface density and intact epitope conformation |
| Step 2: Negative Pre-clearing | Deplete non-specific and matrix binders | BSA, casein, milk blocks, empty matrix base | Elimination of background noise and plastic-binding clones |
| Step 3: Incubation & Binding | Allow library variants to engage target epitopes | Phage display library, PBST, gentle rotators | Optimized thermodynamic equilibrium and binding kinetics |
| Step 4: Stringent Washing | Remove weak, transient, and non-specific clones | Tween-20 variations, high-salt PBS iterations | Complete removal of low-affinity background variants |
| Step 5: Phage Elution | Recover high-affinity bound particles cleanly | Glycine-HCl (pH 2.2), triethylamine, or protease | Maximizing recovery rate while maintaining clone viability |
| Step 6: Amplification & Rescue | Multiply eluted clones for successive round use | E. coli (TG1/ER2738), helper phage (M13K07) | Accurate output titration tracking for subsequent input tracking |
2. Molecular Dynamics: The Thermodynamics of Library Selection
To successfully execute a typical biopanning process, a bioprocess engineer must master the principles of molecular kinetics and thermodynamic equilibrium. Phage display selection isolates elite binders from an initial background population where target-specific clones may occur at a frequency of only 1 in 10 million. The entire workflow operates as an iterative biological sorting system designed to systematically enrich target-specific variants over multiple successive rounds.
From our experience, managing selection stringency requires balancing panning thermodynamics across each round. In early cycles, the primary focus is maximizing the absolute recovery rate of potential candidates; therefore, target concentrations are kept relatively high, and washing steps remain moderate. In later rounds, the focus shifts to selective affinity maturation. By lowering the concentration of the immobilized target antigen and extending the duration of the washing steps, researchers can select clones with low dissociation rates ($k_{off}$), ensuring the final isolated sequences possess the binding kinetics required for therapeutic efficacy.
From Our Experience: The Antigen Denaturation Hazard
We recommend verifying the structural integrity of your target antigen after immobilization. Passive adsorption onto standard polystyrene plates can expose hydrophobic internal cores, causing delicate proteins to denature. This structural change causes the library to screen against artificial shapes, resulting in clones that fail to recognize the native protein on living cells. To avoid this, we recommend utilizing biotinylated targets immobilized over streptavidin surfaces to preserve native protein structures throughout the typical biopanning process.
3. Deep-Dive: 6 Steps in a Typical Biopanning Process
Step 1: Preparation and Target Immobilization
The biopanning process begins with the structural immobilization of the target antigen onto a solid surface support. Depending on the downstream goals of your discovery program, this support can consist of high-binding polystyrene ELISA wells, porous magnetic beads, or the exterior membrane of living cells. The target molecule must be distributed at a uniform density while keeping its extracellular loops open and unhindered, ensuring the displayed library variants have full access to functional native epitopes.
Step 2: Negative Selection and Pre-clearing
To ensure the final enriched clones target the specific antigen rather than background materials, a pre-clearing or negative selection step is required. The raw phage library is incubated over un-functionalized plastic wells, blocking agents like bovine serum albumin (BSA), or streptavidin-only magnetic matrices. Clones that display a natural affinity for these background materials bind to the pre-clearing surface and are discarded, ensuring only true antigen-seeking variants remain in the fluid mix.
Step 3: Incubation and Library Binding Dynamics
Once pre-cleared, the refined display library is brought into direct contact with the target antigen. Sourcing from an advanced, high-diversity Phage Display Platform gives your program access to comprehensive M13 or T7 recombinant setups holding over 10^10 independent functional sequences. During this incubation phase, temperature and ambient rotation parameters are carefully modulated to allow specific clones to reach thermodynamic equilibrium and lock securely onto the target epitopes.
Step 4: Stringent Washing to Eliminate Background Noise
Following incubation, the fluid containing unbound and weakly associated phage particles is removed. The solid support surfaces undergo multiple cycles of stringent washing using specialized phosphate-buffered saline solutions containing surfactant detergents like Tween-20 (PBST). As selection rounds progress, technicians increase the detergent concentration and extend the duration of the washes to disrupt transient ionic bonds, ensuring only high-affinity candidates remain bound.
Step 5: Controlled Phage Elution
To recover the high-affinity candidates for downstream analysis, the bound phage particles must be released from the target antigen. This elution is typically achieved by introducing a low-pH buffer, such as glycine-HCl (pH 2.2), which alters ionic charges to break the antibody-antigen bonds rapidly. Alternatively, enzymatic cleavage using an integrated protease site can be deployed. From our experience, the eluted mixture must be neutralized immediately with a high-pH Tris buffer to prevent structural damage to the phage particles and maintain their infectivity.
Step 6: Bacterial Infection, Amplification, and Rescue
The final stage of the selection loop involves amplifying the eluted phage particles to prepare for successive screening rounds. The recovered low-volume elution mixture is mixed with mid-log phase Escherichia coli (such as TG1 or ER2738 strains). These bacterial cells are highly susceptible to phage infection, allowing the internalized recombinant phagemid DNA to replicate. By introducing a helper phage (like M13K07), the host bacteria are induced to produce a fresh, amplified batch of physical phage particles, completing the selection loop and providing an enriched input for the next biopanning cycle.
4. Downstream Optimization: Humanization, Expression, and Validation
Successfully isolating elite binding sequences through a typical biopanning process marks the transition from initial library screening to high-throughput validation and therapeutic engineering.
For research teams utilizing specialized peptide configurations for diagnostic testing or custom mapping arrays, exploring our comprehensive Peptide Library Platform delivers outstanding screening tools. If your project begins with non-human animal sources, modifying those sequences is an essential step toward ensuring clinical safety. Sourcing from our advanced Antibody Humanization Platform allows you to graft complementary-determining regions (CDRs) seamlessly onto human germline frameworks, completely eliminating the risk of human anti-mouse antibody (HAMA) immune reactions in clinical settings.
| Advanced Discovery Asset Class | Core Technical Capability | Primary Laboratory Validation Tool | KMD Bioscience Sourcing Link |
|---|---|---|---|
| Single B Cell Screening | Isolates native paired heavy/light chains directly from immune repertoires | High-throughput microfluidic screening chips | Single B Cell Platform |
| Recombinant Expression | Scales transient yields from pilot milligram lots to gram quantities | SEC-HPLC, SDS-PAGE, and endotoxin monitoring assays | Expression & Validation Hub |
| Custom Antibody Generation | Develops custom monoclonal and polyclonal tools against difficult targets | Affinity ranking via SPR/BLI binding kinetic tracking | Custom Antibody Platform |
Scaling Production with High-Throughput Expression Systems
To explore alternative, native hit-generation methods that bypass synthetic display libraries entirely, research teams can leverage our ultra-fast Single B Cell Screening Platform to capture paired heavy and light chain sequences directly from activated splenocytes. Once your discovery pipeline identifies your lead candidate sequences, moving them to production requires reliable, high-yield manufacturing systems. Sourcing from our state-of-the-art Antibody Expression & Validation Platform provides access to transient mammalian expression systems (CHO/HEK293) and automated Surface Plasmon Resonance (SPR) analysis to verify exact binding kinetics. Whether your project demands standard tool production or custom diagnostic assays, our comprehensive Custom Antibody Platform delivers the industrial precision, regulatory support, and technical expertise needed to advance your life science research.
5. Frequently Asked Questions (FAQs)
What is the core difference between standard phagemid vectors and full phage genomes?
Phagemid vectors are compact plasmid structures containing an origin of replication for both E. coli and filamentous phage, along with the gene for a display coat protein (such as pIII). They do not contain full packaging machinery, meaning they require a co-infection step with a helper phage to assemble physical particles, whereas full phage genomes contain all genes required to complete the packaging loop independently.
How many rounds of selection are typically executed in a typical biopanning process?
A standard discovery program typically executes between 3 and 4 sequential rounds of biopanning. Running fewer than three rounds may not achieve adequate enrichment for rare high-affinity binders, while extending selections past the fourth round can lead to library collapse, where fast-growing but low-affinity clones dominate the amplification steps.
Why must eluted phage particles be neutralized immediately with Tris buffer?
Most biopanning protocols utilize an acidic glycine-HCl buffer (pH 2.2) to break the ionic antibody-antigen bonds cleanly. Leaving the recovered phage particles in this highly acidic environment can denature their protein coat capsids and permanently destroy their ability to infect E. coli host cells, making immediate neutralization with a high-pH Tris buffer essential for preserving viability.
What is the purpose of adding a helper phage during the amplification stage?
Because phagemid vectors lack the genes needed to synthesize structural coat proteins and coordinate viral packaging, the host bacteria cannot assemble new physical particles on their own. Introducing a helper phage (such as M13K07) provides the missing structural genes, allowing the cell to package the phagemid DNA into functional display particles.
Can biopanning be executed against complex targets like whole living cells?
Yes, absolutely. This method is known as cell-based biopanning or whole-cell panning. It allows researchers to screen libraries against native membrane proteins, such as G-protein coupled receptors (GPCRs) or tumor-associated antigens, in their true physiological conformation, ensuring the isolated binders translate effectively to live-cell applications.
6. Regulatory and Academic Life Science References
For official laboratory safety compliance parameters, international quality control standards, and peer-reviewed research regarding phage display technologies, consult these authoritative organizations:
International Organization for Standardization. ISO 9001:2015 Quality Management Systems – Requirements for Biotechnology Contract Research Laboratories. Geneva, Switzerland.
National Center for Biotechnology Information (NCBI). Phage Display Selection Frameworks and Thermodynamic Modeling Databases. Bethesda, MD.
World Health Organization (WHO). International Standards for Biological Evaluation and Validation of Monoclonal Antibody Products.

- Protein Platform
- Protein Expression Services
- Protein Modification & Detection Services
- Protein Interaction Services
- Protein Purification Service
- Antibody Discovery Platform
- VHH Antibody Platform
- Phage Display Platform
- Antibody Humanization Platform
- Single B Cell Screening Platform
- Antibody Expression & Validation Platform
- Peptide Library Platform
- Custom Antibody Platform
- Innovative Drug Discovery Platform
- Product Center
- Proteins
- Antibodies
- Raw Materials Reagents
- Small Molecule Reagents
- Peptide Products
- Nanoparticle Products
- Contact Us
- Phone:400-621-6806
- Mobile:13110936064(WeC
- E-mail:[email protected]
- Address:Room 108, Building 10, No. 6 Hechang Road, Wuqing Development Zone, Tianjin City
-

WeChat
-

Service Account
-
 400-621-6806
 -
 3599163699
 -
 Monday to Friday 9:00-18:00
 -

-
 0
0
-
